

Getting Started as a Tenancy Manager
What to know when you have been assigned the Tenancy Manager role.
This guide is for users who have been assigned the Tenancy Manager role in DekkoSecure. It walks you through the key setup tasks, explains what you are responsible for, and points you to the detailed guides you will need along the way.
The Tenancy Manager role is assigned by DekkoSecure staff. If you believe you should have this role but do not see the Tenancy Manager controls in your account, please submit a support request.
Since the Tenancy Manager manages a broad range of tasks, all guides in the Tenancy Management category will be helpful to review as a Tenancy Manager.
What is a Tenancy?
A Tenancy is the top-level organisational level in DekkoCORE. It is the central location where you manage users, enforce policies, review activity, and govern the Hubs that belong to your Tenancy. An organisation can have one or multiple Tenancies depending on its plan.
As a Tenancy Manager, you are the administrator of this environment. However, you do not automatically have access to the files and messages that users store in DekkoCORE. The platform uses end-to-end encryption and explicit sharing, which means content is only visible to the users who own it or have been explicitly granted access. Your role is to manage the organisational structure, not to access user content.
What can a Tenancy Manager do?
As a Tenancy Manager, you have access to the Tenancy Manager dashboard. From this dashboard you can:
- Reset in-Tenancy users’ passwords if the trusted tenant policy is ON (non-SSO/AAD users only).
- Create and delete Core Hubs
- Add and remove users from Hubs
- Assign and change Core Hub user roles (Hub Admin, Team Member, External Member)
- Set up and edit Fusion Hub user groups
- Fusion Hub User Group permissions
- Set and enforce tenancy-wide policies (password requirements, sharing restrictions, upload rules)
- View tenancy activity reports and usage data
- Access in-app audit logs
- Set up SIEM integrations (Log Analytics Workspace / Sentinel)
For a full breakdown of what each role can and cannot do, see Tenancy and Hub Roles.
First login as a Tenancy Manager
The tasks below are listed in the order most Tenancy Managers will need to complete them. You do not need to do everything at once, but working through them in sequence will ensure your environment is properly configured before users start collaborating.
1. Log in and access the Tenancy Manager dashboard
Log in to the DekkoCORE instance for your region:
Australian government and industry - au.dekko.io
Canadian government and industry - ca.dekko.io
US government and industry - us.dekko.io
Healthcare professionals - health.dekko.io
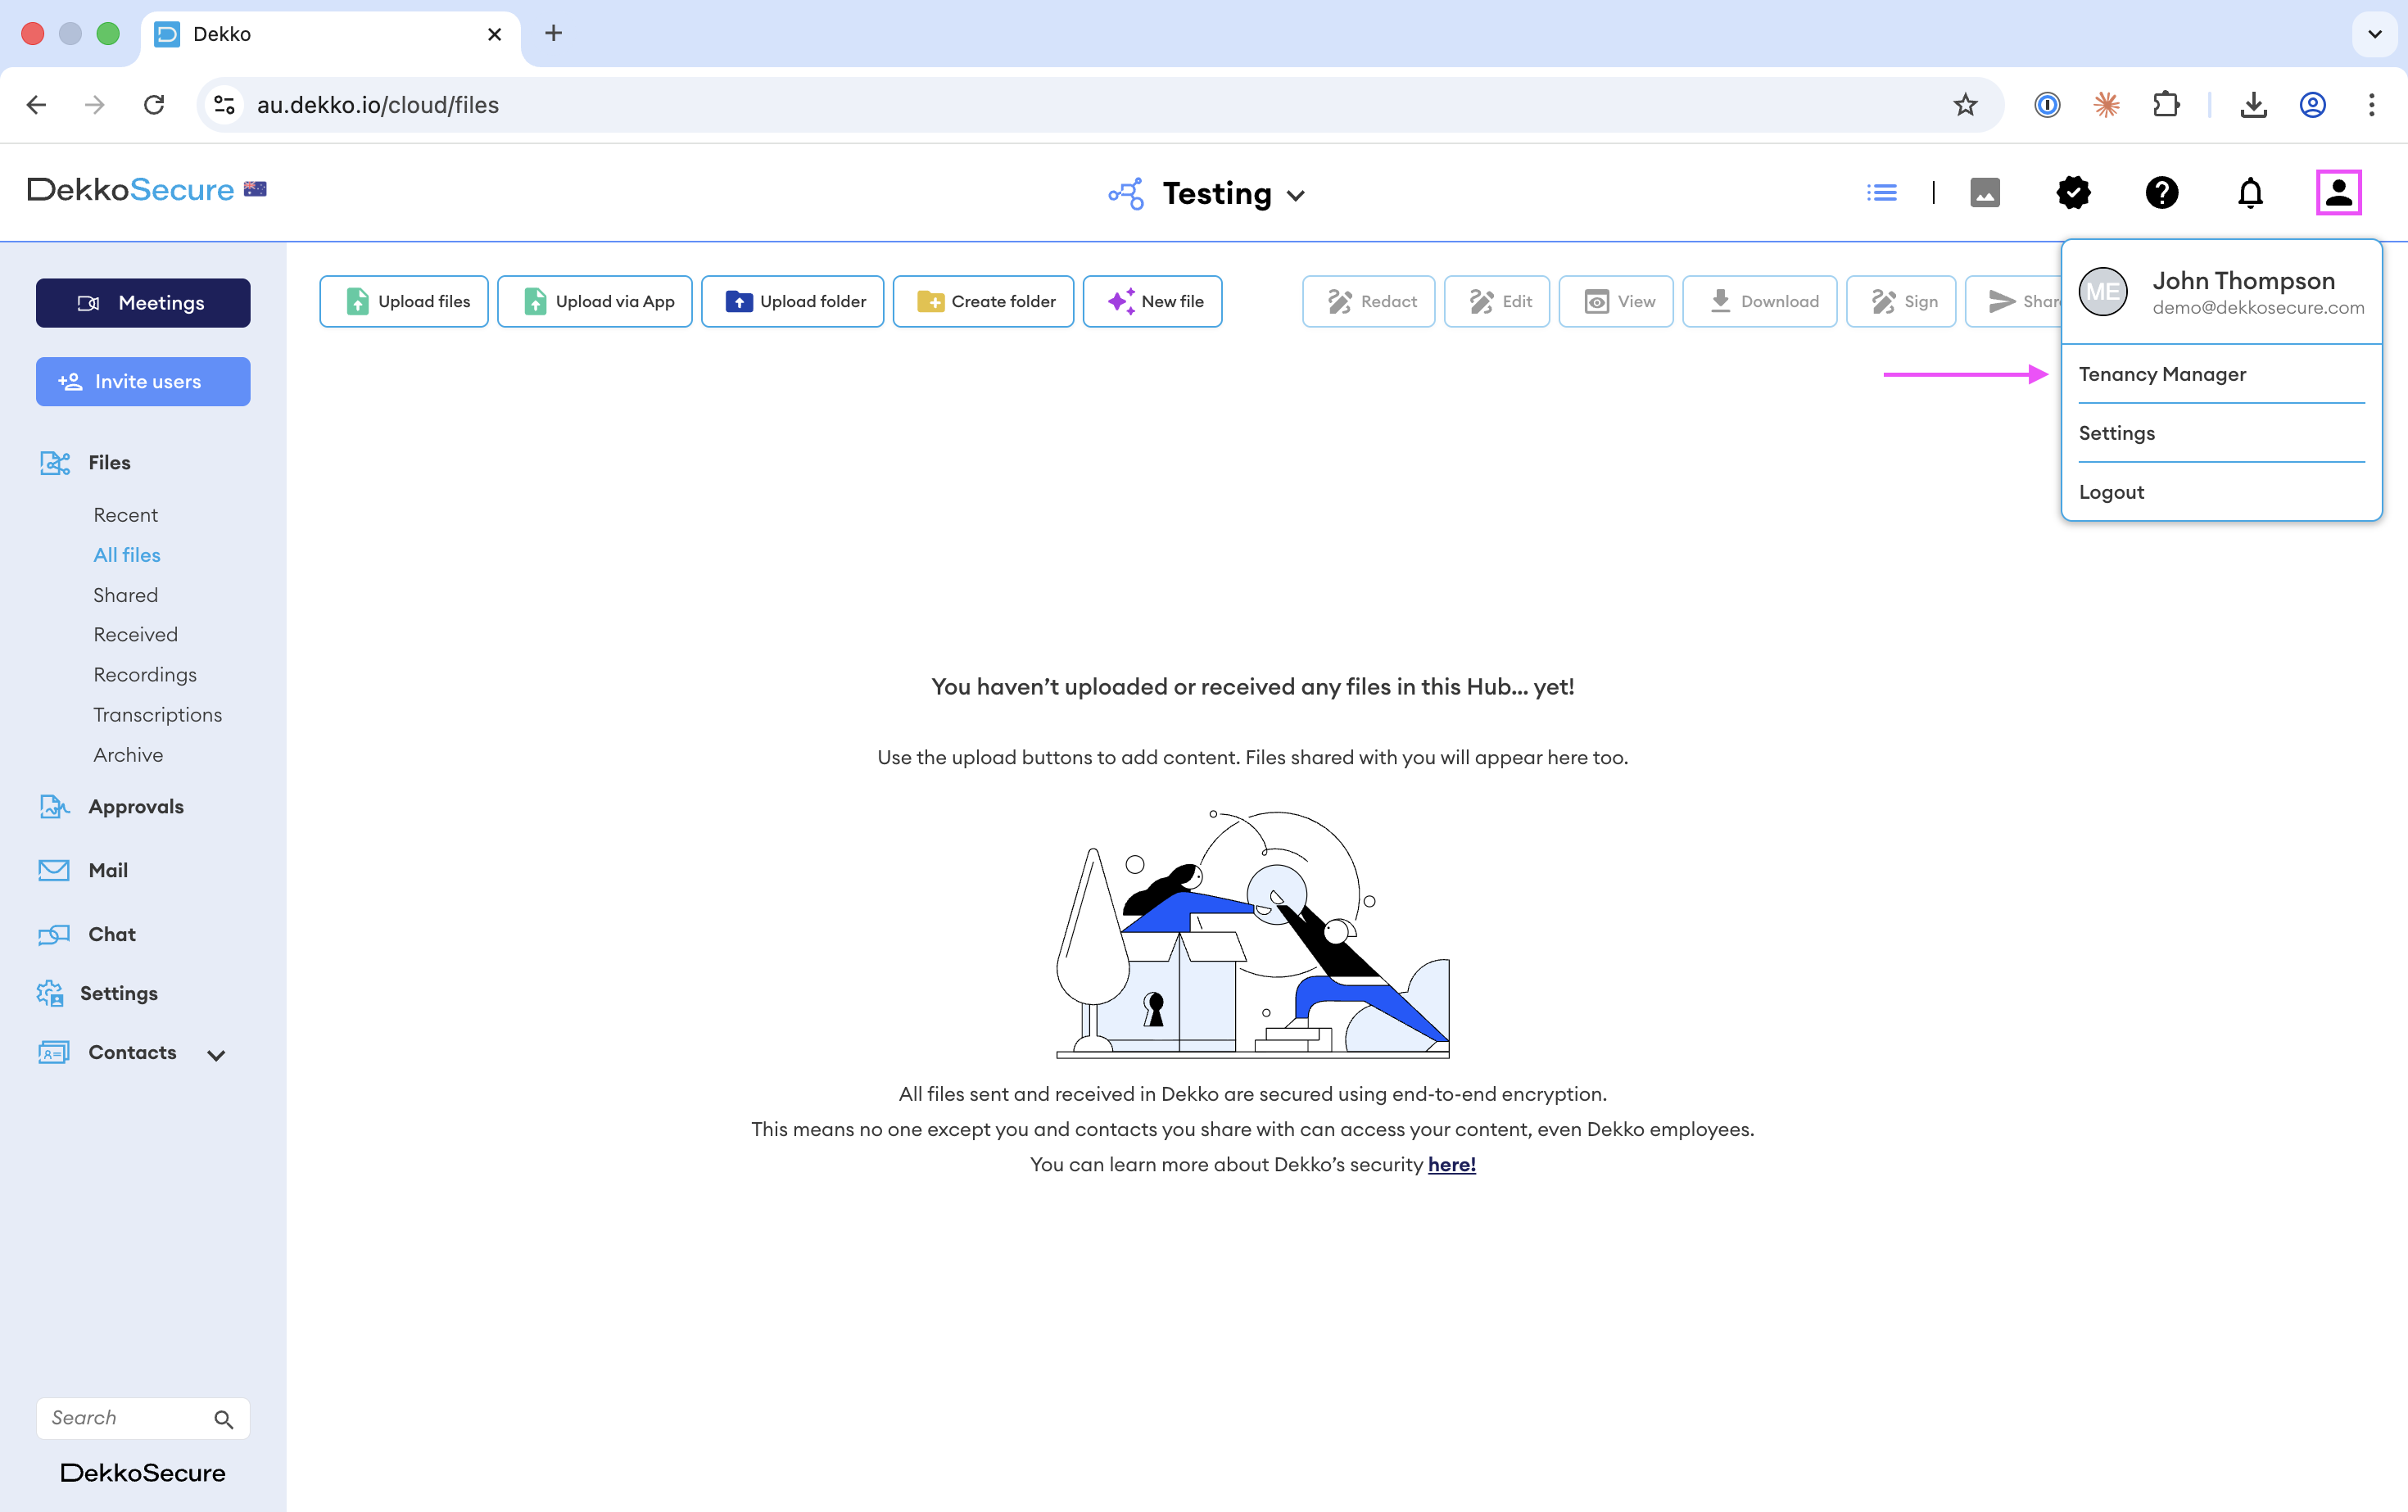
Once logged in, select Tenancy Manager under your profile in the top right corner:
2. Review and set Tenancy policies
As a part of the onboarding DekkoSecure will always go through the full set of Tenancy policies and map them with you. Before you add users or create Hubs, we recommend that you review the Tenancy policies to check they are set in alignment with internal security governance policies. Tenancy policies control security and usage rules across your entire environment, including:
- Nominating password complexity and session expiry
- Enforcing 2FA
- Setting standard invite messages to new users in the Tenancy
- Attributes enforcement (classification)
- Configuring status tagging
- Setting file size upload limits
- Enabling a Central Access Admin and/or Central Backup Account
- Setting up user groups for Fusion Hubs
To configure policies, open the Tenancy Manager dashboard and select the Policies tab.
For a detailed explanation of each policy setting, see Tenancy Policies article.
3. Create your first Hub
Hubs are the collaboration spaces where your users will store, share, and work on files. Think of a Hub as a secure project workspace, team folder, case folder or whatever makes sense in your context. DekkoCORE got two types of Hubs, Core and Fusion Hubs. Core Hubs is set up with explicit sharing for document collaboration and sharing, while Fusion Hubs is set up with user groups with default sharing which makes it implicit.
There’s several ways to create a Core Hub. When you first login:
- Login and see the initial dashboard.
- Select the Core Hubs dropdown menu in the top of the screen.
- Select + New Hub.
- Fill in the form and click Create Hub to confirm.
You can also create a Core Hub within the Tenancy Manager:
- Open the Tenancy Manager dashboard.
- Select the left Hubs tab.
- Select + Create Hub.
- Fill in the form and click Create Hub to confirm.
You will automatically become the Hub Admin for any Hub you create. You can later assign additional Hub Managers from within the Hub. You can also remove yourself as Hub Admin after setting a second one.
For more detail on Hub configuration and management, see Create and Manage Core Hubs article.
It is only DekkoSecure employees that can set up a Fusion Hub. If you wish to add one to your Tenancy please reach out to your Account Manager.
4. Add users to your Hubs
Once you have created a Hub, you can add users to it. If users don’t already have an account when inviting them, they will get an invite email when being added to a Hub.
Add a users from the file management interface:
- Login and select the Hub dropdown menu in the top of the screen.
- Select the Hub (either Core or Fusion) you want to add new users to.
- Select the Invite users tab in the left navigation bar.
- A new window will show up, type the users email address, select if they are External or Team Member.
- Send the invite to add the user to the Hub.
The user will receive an email notification that they have been added to the Hub.
Edit a user's membership:
From the Tenancy Management interface (user must already be in the Tenancy):
- Select the Users tab and locate the user.
- Click the [•••] dropdown and select Change memberships.
- Find the Hub in the list and set their membership type.
- Click Update to save changes.
For more detail on user management, see Adding Users to a Hub article.
5. Set or edit a User Group
From the Tenancy Management interface:
Select the User groups tab.
Select + Create Group to create a new user group or ... to update a current user groups.
To add new members to the user group that has already been invited to the Tenancy, type their name or email and select them in the dropdown. For new users on the DekkoCORE platform, type their email and click enter to add them to the list, they will receive an invite when the group has been saved.
To remove any users from a group, click the X symbol.
Click Save group to save the new or updated user group.
6. Understand Core Hub roles
When you add a user to a Core Hub, you assign them one of three roles. Choosing the right role determines what that user can see and do within the Core Hub.
Hub Admin: Full control over the Hub. Can add and remove users, change roles, view Hub Audit logs, manage Hub branding and configure Hub-level settings. Assign this role to team leads or project managers who need to manage the workspace.
Team Member: Can share files with, request signatures from, and message other Team Member and External Members with the Hub. Can see other Hub members and if given the permissions invite users to the Hub and create additional Core Hubs. This is the standard role for internal users who need full collaboration access.
External Member: Can share files with, request signatures from, and message Team Member users in the Hub. Can see Team Member users in the Core Hub contact list but not other External Members. Create additional Core Hubs (if allowed in Tenancy policies). Assign this role to external partners, contractors, or collaborators who need access to specific files but should not have full visibility of the Hub.
For a complete permissions breakdown, see Tenancy and Hub Roles article.
7**. Understand User Groups**
When you add a user to a User Group, they will be added to a user group of their own, which is what you can share folders and files with them directly. You can also add the user to a new or exciting group.
Default sharing: You can set up the default sharing which gives groups of individual or user groups a default access to everything shared within the Fusion Hub no matter who added it. The sharing permission options includes listing only and all the way to full permissions.
8. Configure authentication
DekkoSecure recommends multi-factor authentication (MFA) for all users. You have three options for how authentication is handled in your organisation:
Standard authentication: Users register with an email address and password, then enable TOTP-based two-factor authentication (2FA) using an authenticator app. No configuration is required from you as the Tenancy Manager, users will be prompted to set up 2FA when they first log in.
Passkeys: Non-SSO users can add a passkey for password-less authentication. Passkeys can be stored on a device, synced through a password manager, or bound to a hardware key (e.g. YubiKey). To set up a passkey, see Enable Passkeys on Your Account article.
Single Sign-On (SSO): If your organisation uses Microsoft Entra ID (formerly Azure AD), you can configure SSO so that users authenticate through your existing identity provider. This gives you centralised control over access, conditional access policies, and user provisioning.
To set up SSO, see Entra ID SSO Integration article.
9. Set up audit logging and monitoring
DekkoCORE records all user and administrative activity in an immutable audit log. As a Tenancy Manager, you can review activity in two ways:
In-app audit logging: View activity logs directly in the Tenancy Manager dashboard. This gives you visibility into user actions, file operations, and administrative changes within your Tenancy.
SIEM integration (optional): If your organisation uses a Security Information and Event Management system, you can connect DekkoCOREto a Log Analytics Workspace and forward audit data to Microsoft Sentinel (or a compatible SIEM). This is recommended for organisations with centralised security monitoring requirements.
For setup instructions, see:
FAQ for Tenancy Managers
You cannot access user content
DekkoCORE uses end-to-end encryption and for Core Hubs explicit sharing. As a Tenancy Manager, you can manage users, policies, and organisational structure, but you cannot view, open, or download files or messages unless the content owner explicitly shares them with you. This is by design and is a core security property of the Core Hubs.
Deleting a Hub is permanent
When you delete a Hub, all files and messages stored in that Hub are permanently deleted, regardless of who uploaded them. User accounts and audit logs are not affected by Hub deletion, but the content itself cannot be recovered. Always confirm with Hub members before deleting a Hub.
The Tenancy Manager role is assigned by DekkoSecure
Unlike Hub Manager, which can be assigned by other Hub Managers or by creating a new Hub, the Tenancy Manager role can only be assigned by DekkoSecure staff. If you need to add another Tenancy Manager to your organisation, please submit a support request.
Policy changes take effect immediately
When you change a tenancy policy, the change applies across all Hubs and users in your Tenancy immediately. There is no staging or preview mechanism. Test policy changes carefully, especially restrictions on sharing, uploading, archiving or security features as they may disrupt active workflows.
Browser whitelisting may be required
Depending on your organisation's network configuration, your IT team may need to whitelist DekkoSecure domains and related services. See Whitelisting and Browser Settings for the full list of domains and ports to allow.
Recommended setup checklist
Use this checklist to track your initial configuration. The order follows the steps described above.
- Log in and confirm you can access the Tenancy Manager dashboard
- Review and configure Tenancy Policies
- Create your first Hub (or Hubs)
- Request DekkoSecure staff to set up any Fusion Hubs
- Add users to your Hubs with appropriate roles and permissions
- Review the in-app audit log to capture activity
- If required, configure SIEM integration
- Share onboarding instructions with your users
- Ensure your IT team has whitelisted the required domains